

Introduction
Hello Coders, in this blog we shall know the process of creating Visual ETL job in AWS Glue. In AWS Glue, we can build ETL jobs either by using AWS Glue studio or using Pyspark or Python code. In this blog, we shall focus only on AWS Glue studio.
If you have directly landed on this page, you may have missed the core components of AWS Glue, which you can find on this article. Before building any ETL job, we need to build a AWS Glue Crawler, which help us to build table schema automatically, you can read more about crawler here.
For video Youtube tutorial of this blog click here.
Data Flow diagram of Visual ETL Job :
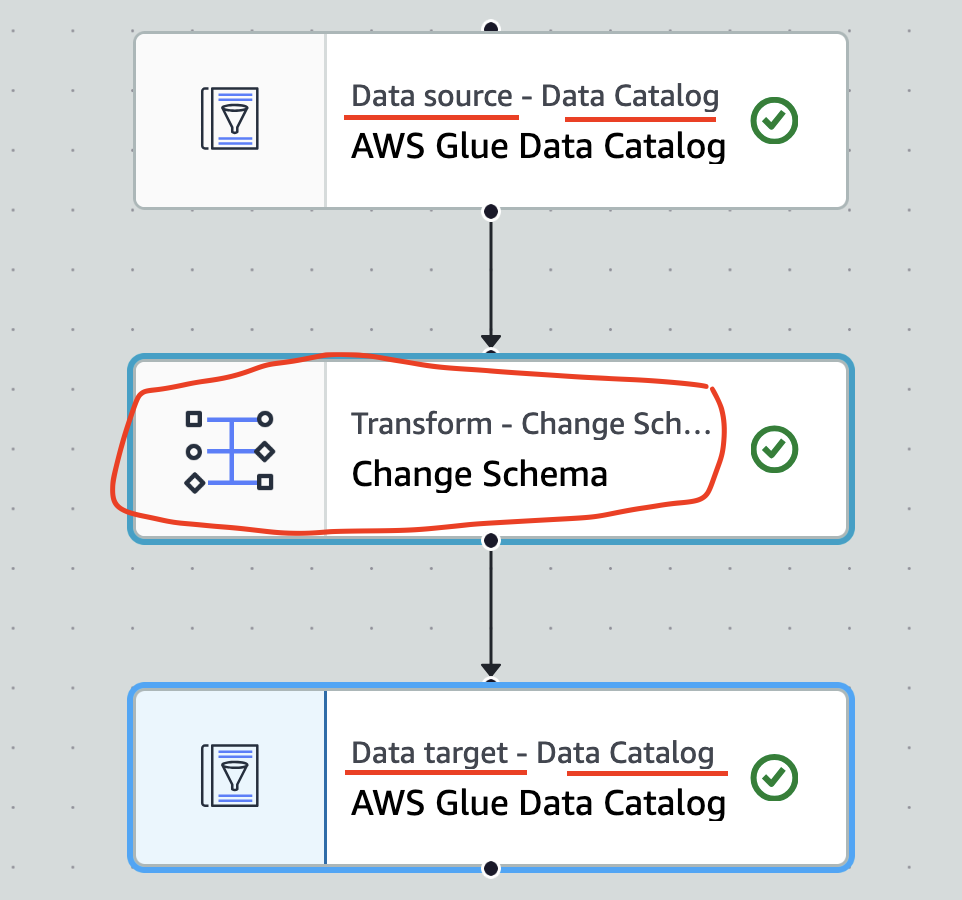
In this experiment, our data source would be a data catalog and our destination will be also a data catalog but tables are differents and in between that we shall have a transformation on the source. Follow the image below for more clarity:
AWS S3 folder and sample csv file:
I have kept a sample csv file inside the Student folder. There are few other folder which I have created manually, otherwise aws would have created for us! Please refer to the image below.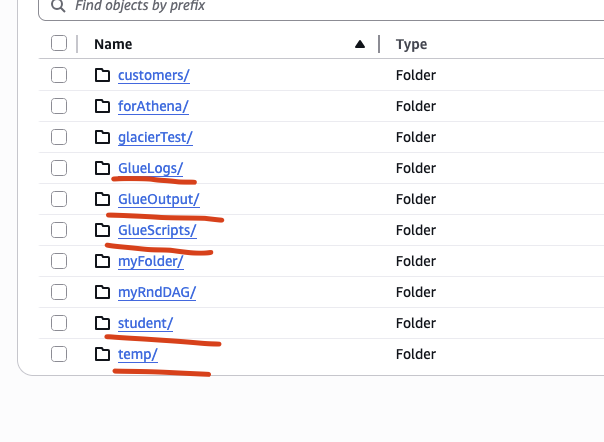
- Glue Logs: stores the history logs of the pyspark script.
- GlueOutput: holds the output csv/parquet of the etl job.
- GlueScripts: holds the script, i.e Python or pyspark file.
- Student: it has the csv file. Click here to get more about the student csv file.
- temp: this is kind of working directory.
Tables under AWS Athena/Data Catalog:
Under Under Athena and Data Catalog, we shall have two tables, i.e Student and Studentnew.
The Student table will show the data before processing. On the contrary, the Studentnew table will show the data after process. In the other words, it will show the data after the ETL job is completed.
Creation of Student table is explained the crawler blog. Similarly, we shall create the studentnew table manually as show in code below.
CREATE EXTERNAL TABLE IF NOT EXISTS
Studentnew(
first_name string,
last_name string,
locationx string
)
ROW FORMAT DELIMITED
FIELDS TERMINATED BY ','
STORED AS TEXTFILE
LOCATION 's3://manual-bucketfor-research-purpose/GlueOutput/'
TBLPROPERTIES ("skip.header.line.count"="1")
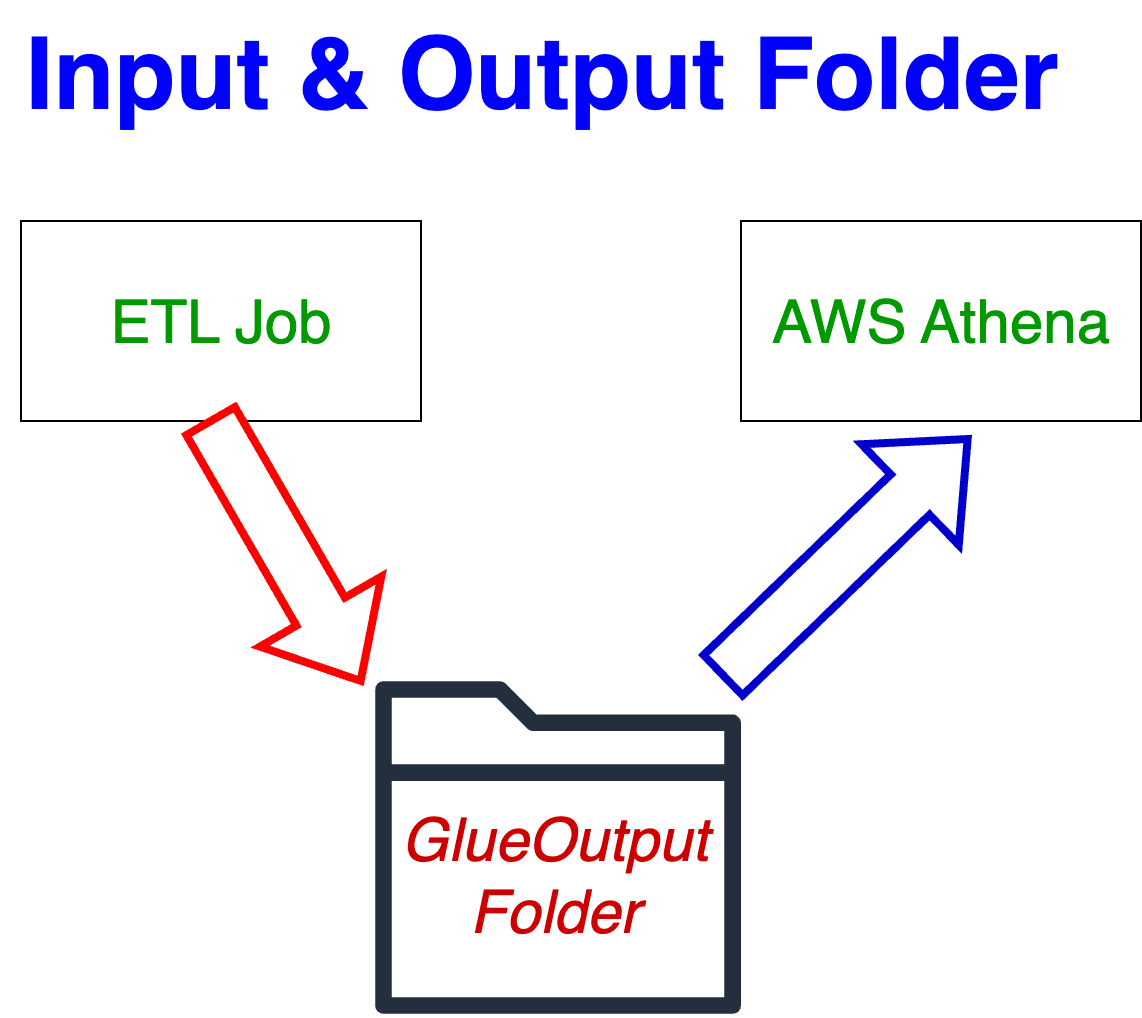
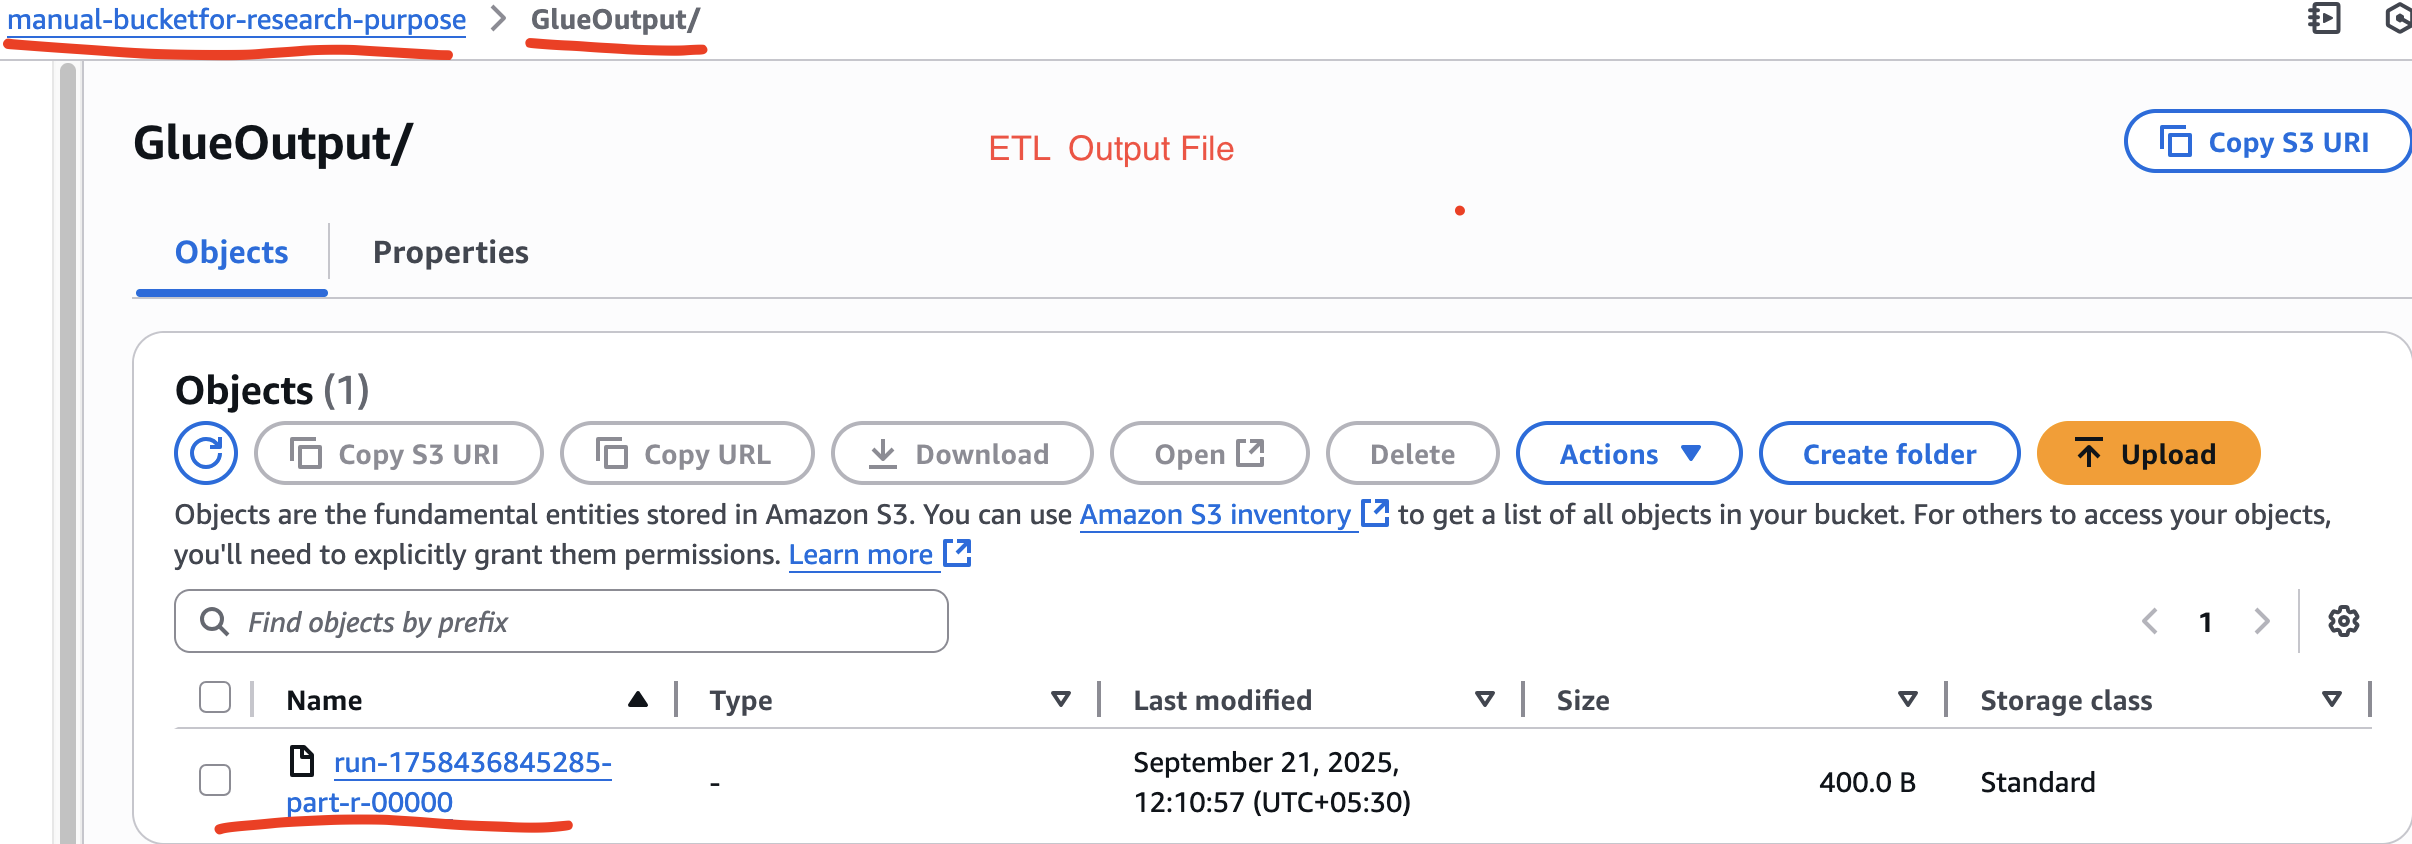
The Location address is pointing to a folder(GlueOuput) where transformed data will be stored by AWS ETL job. Therefore, Athena for Studentnew table will read the data from the specified folder(GlueOuput) to query the data. The image below shows the same logic!
The ETL Job:
The ETL job that we shall do here will be quite simple, now, this is for understanding only!. Here, we shall update the table schema. In other words, we shall rename a column and finish the job.
Steps to create visual ETL job in AWS Glue Page:
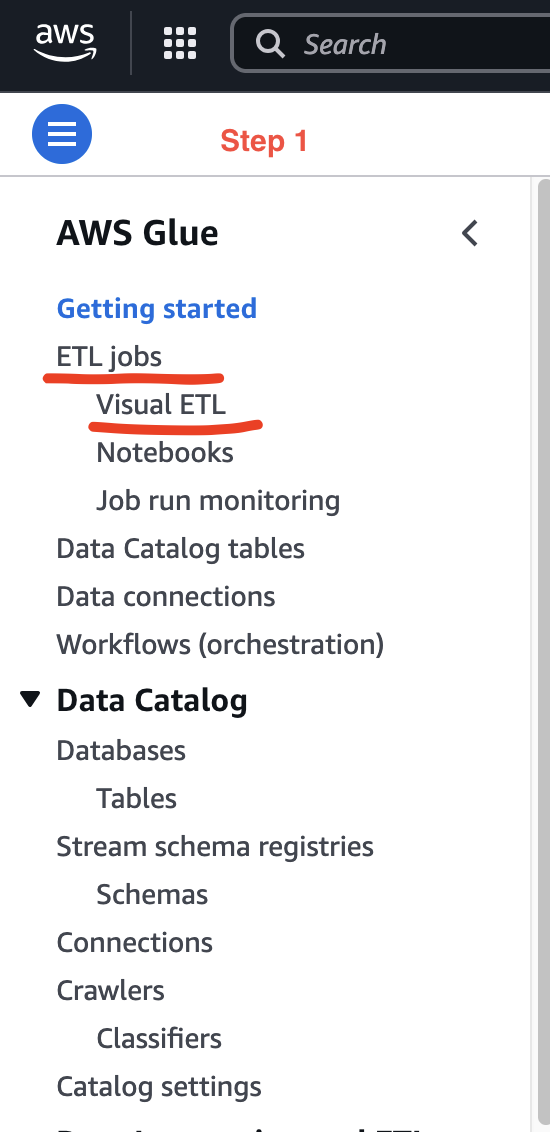
Step 1: From the Glue page, select Visual ETL under ETL jobs section:
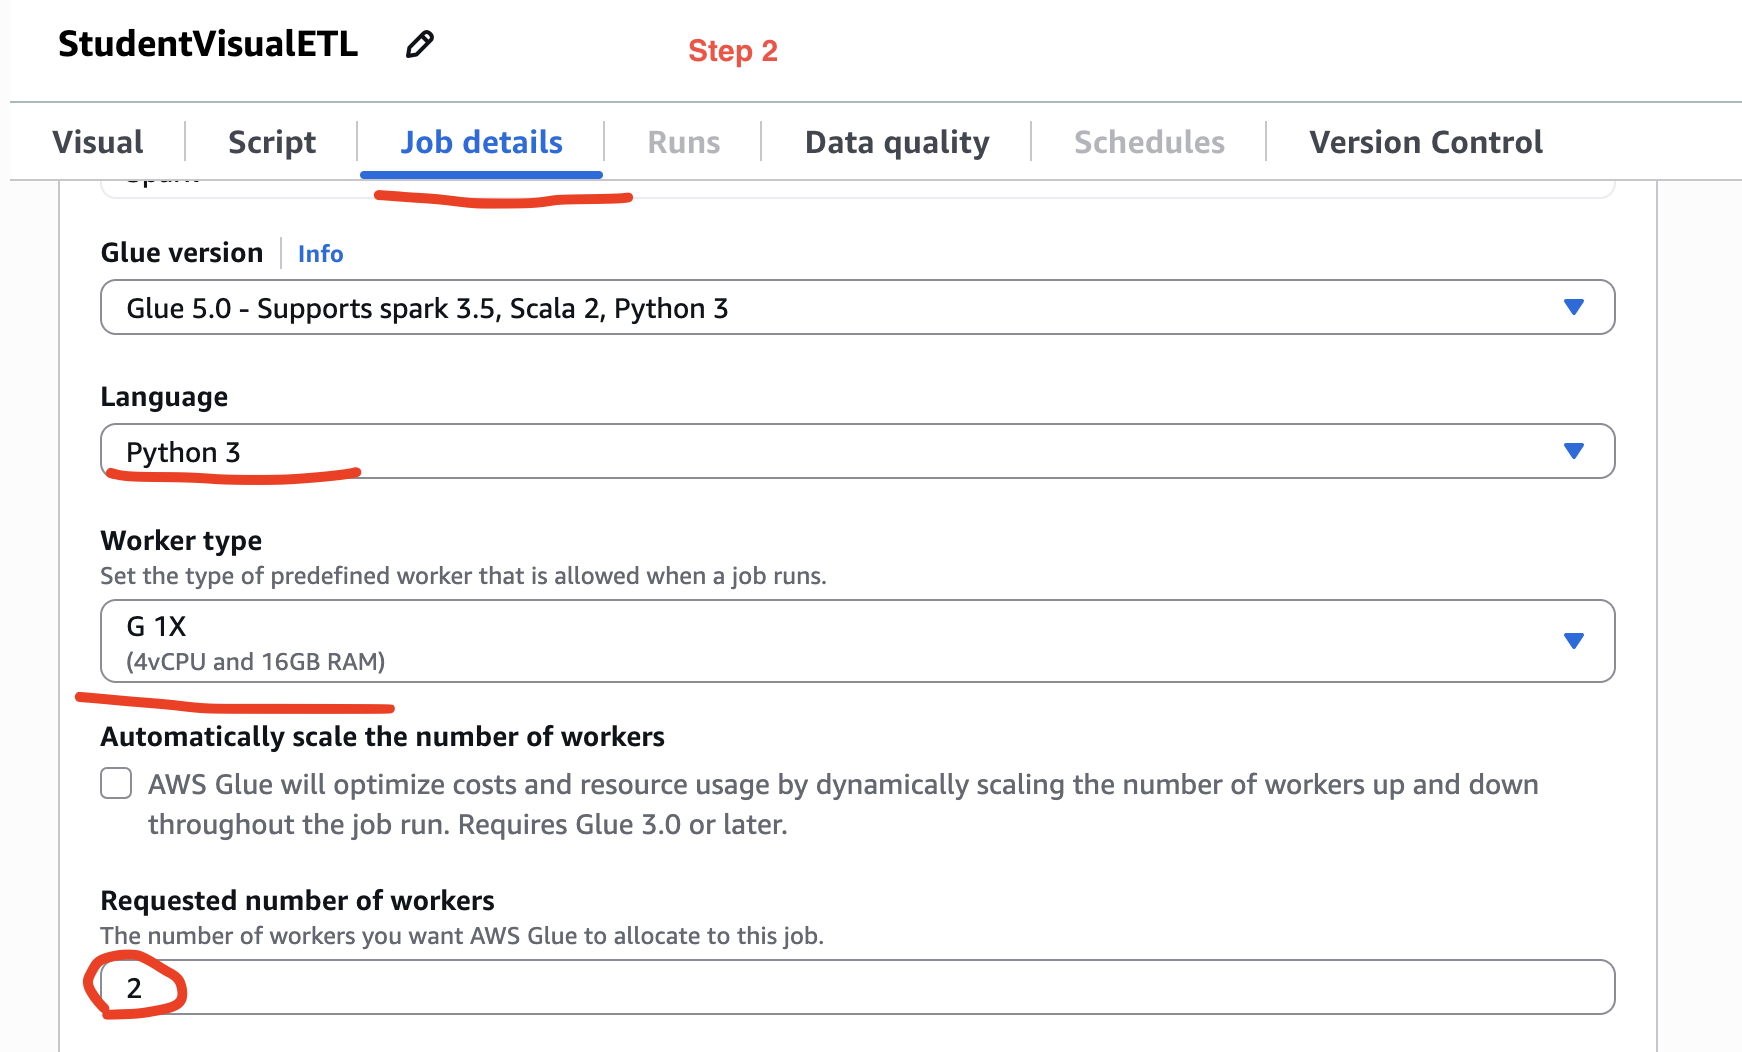
Step 2: First we shall configure job details. As we are not executing ETL on large data. Therefore, make sure we have selected the lowest worker type and lowest number of workers. Give the etl job a suitable name like I have given in the screenshot below.
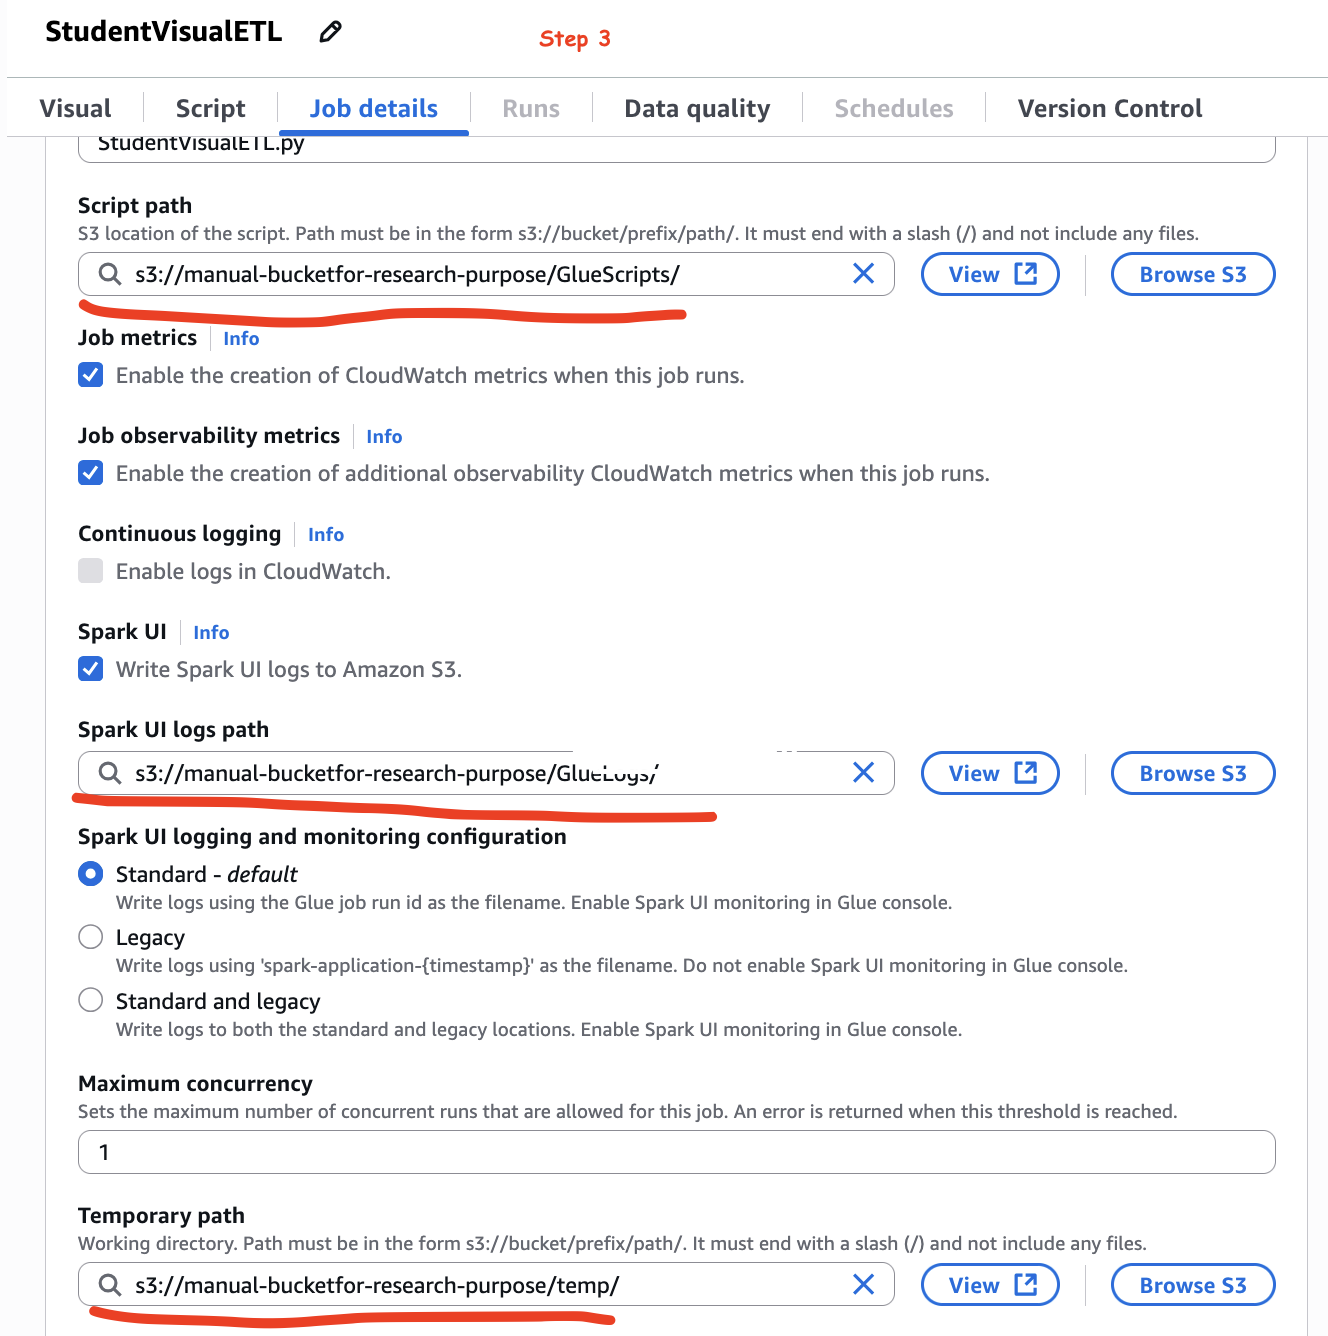
Step 3: In the same tab, down below there are few folder paths. Create these folder in your s3 bucket. Now, I am doing this manually because if I shall not provide, AWS will provide its own path. Therefore, we shall have control where the ETL jobs related data will be stored. Please refer the image below:
 Step 4: In the Visual tab, we shall select data source, in this example, our data source is student table under toy database under data catalog.The image below show the same:
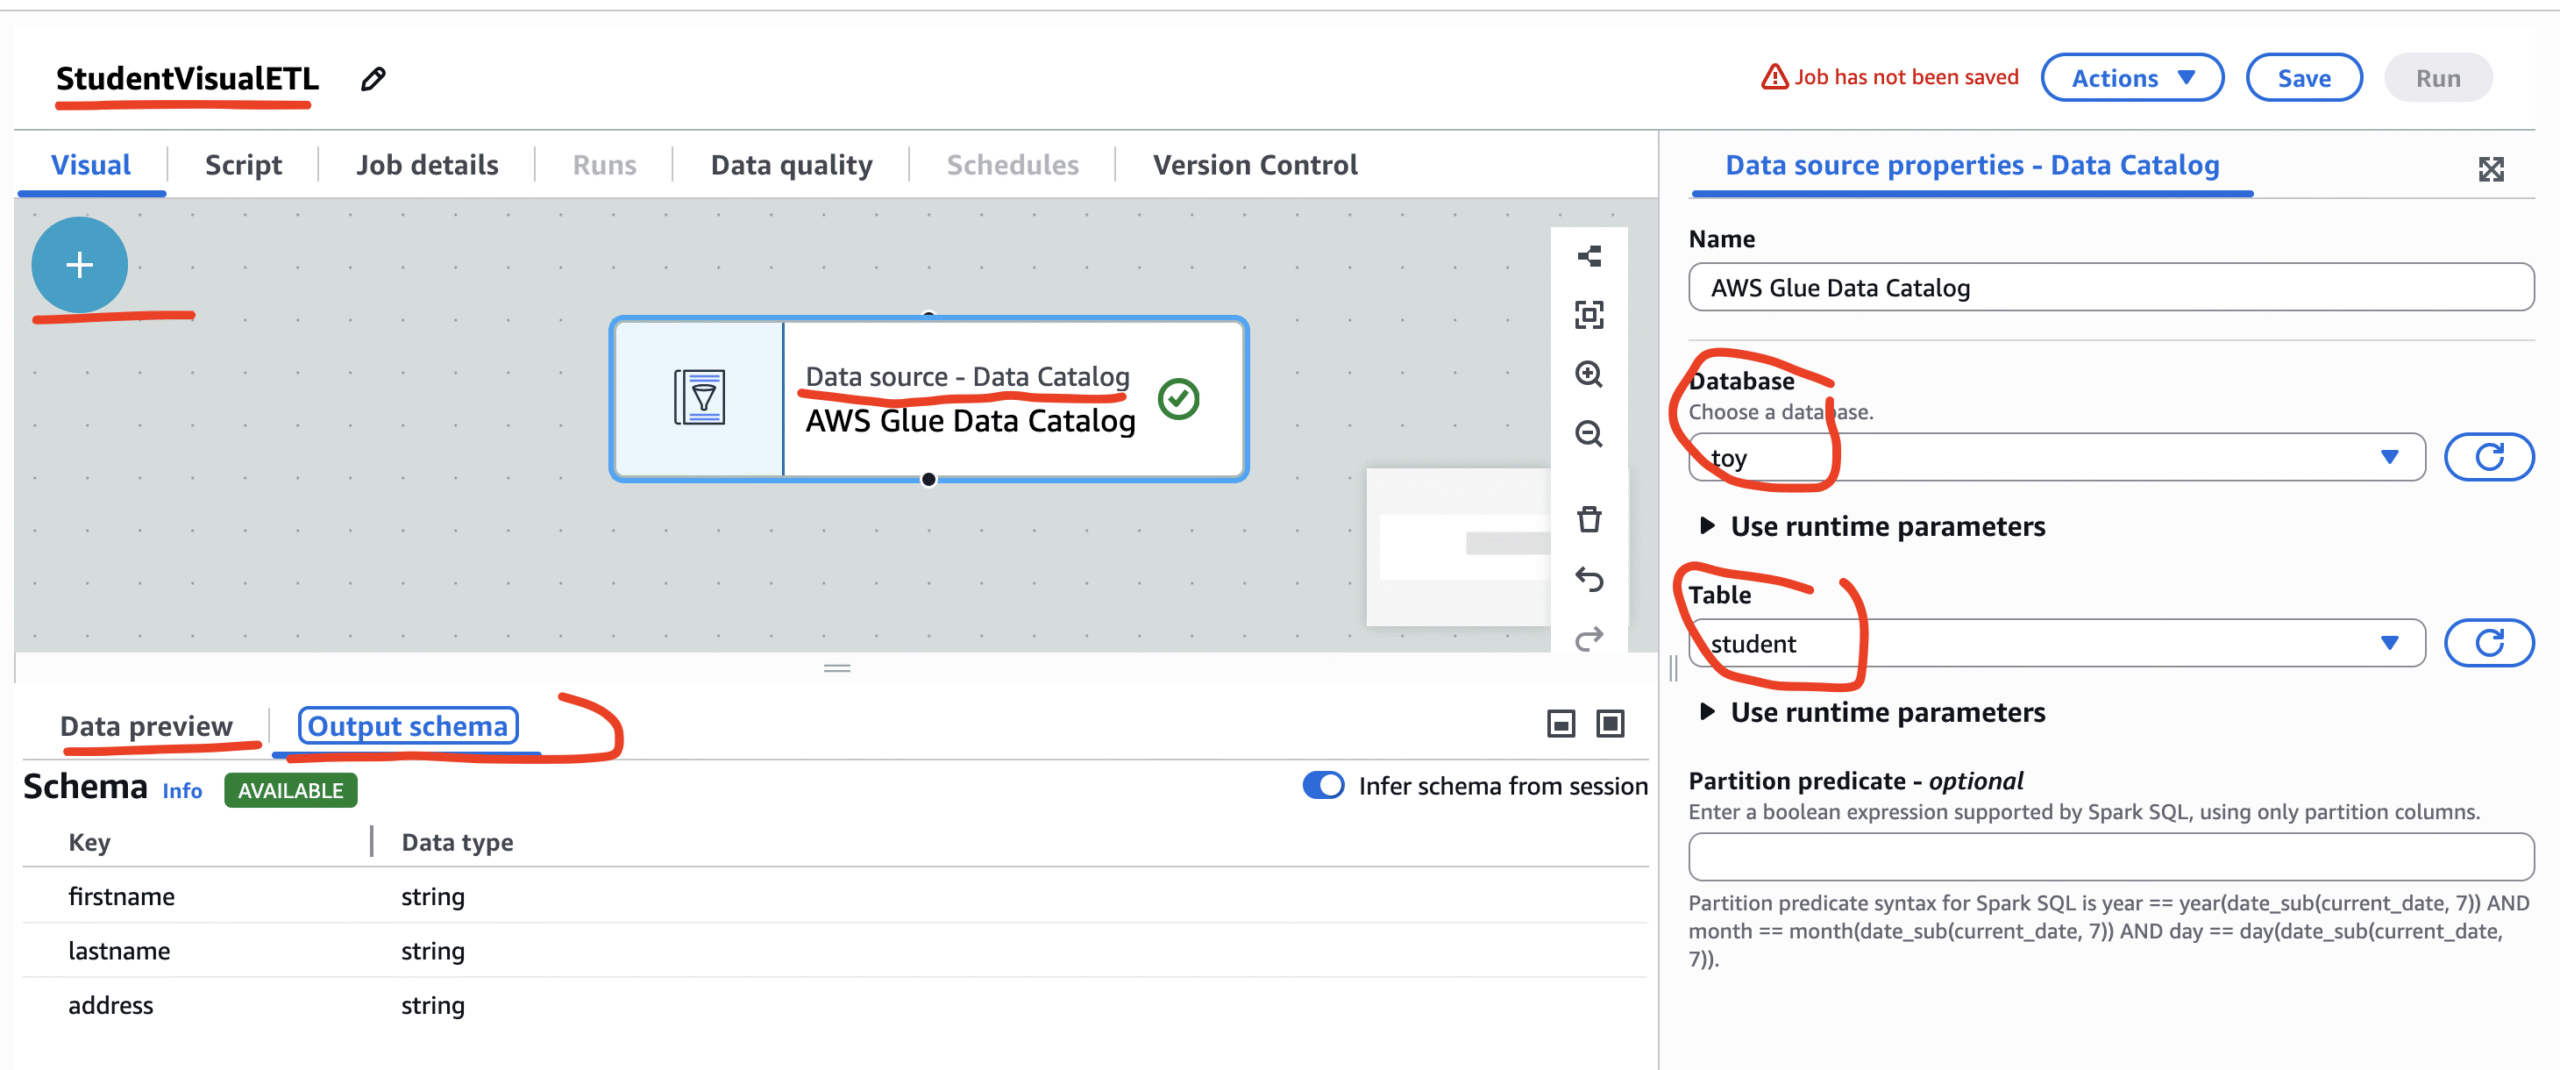
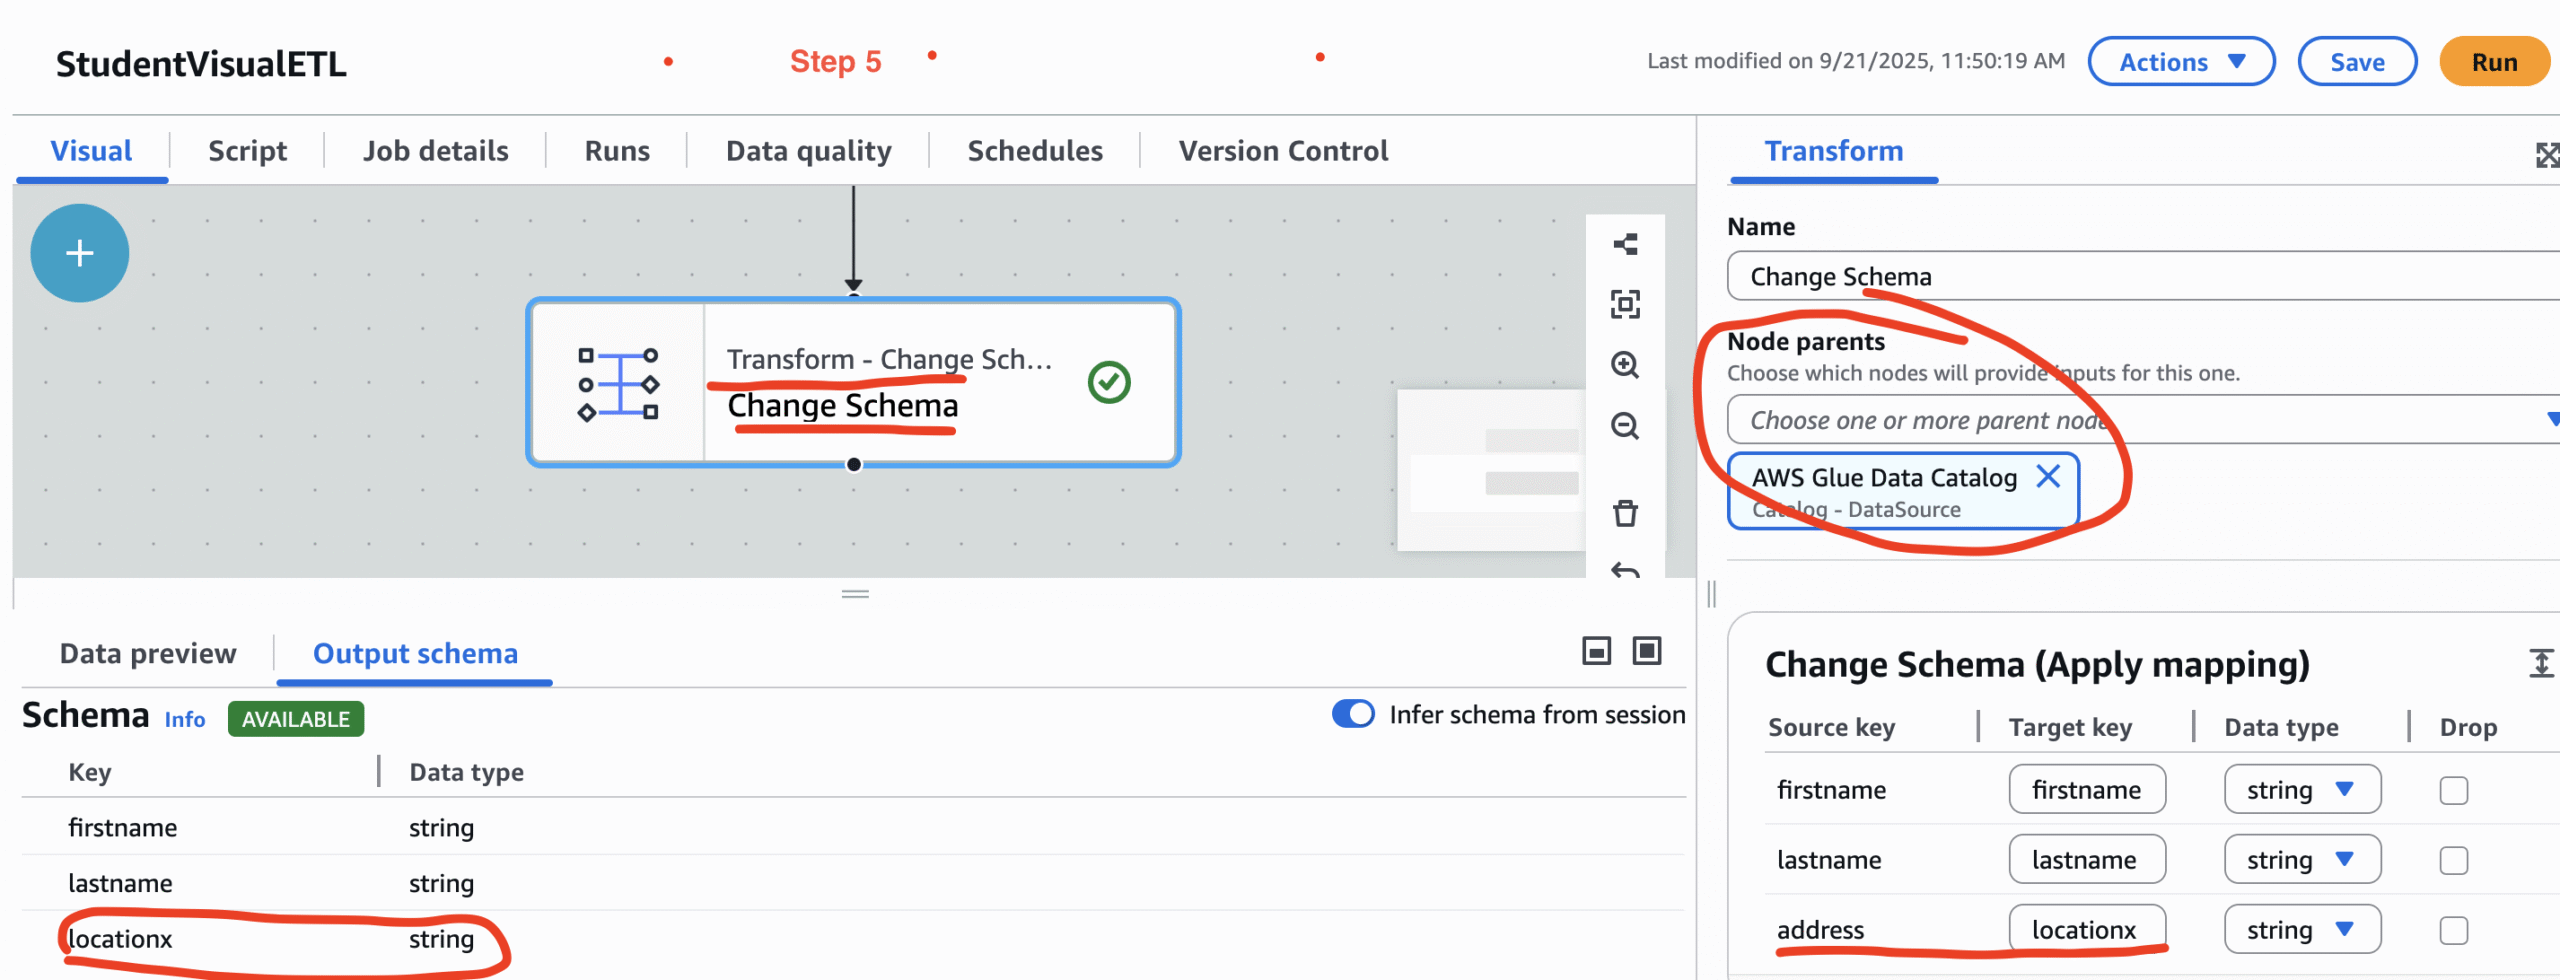
Step 5: This is the transformation phase. Click on the + symbo and create a traformation node.There will be many transformation types. But for this example please select Change Schema. Hence, we are just changing the column name address to locationx.
Step 6 : Again click on the + symbol and select a data target. So, in our case the target is also data catalog and the target table schema is studentnew. Always remember, schema just after transformation and the schema of target table must match.
Step 7: A high level view of node structures. The image below shows the data flow from data source to data target. In the right hand side, we can see the change of column name before and after.

Step 8: When AWS completes ETL job, we can get a new csv file in the GlueOutput folder. This csv file will have the transformed data, which we can also download it. The csv file is saved in GlueOutput folder because when the studentx table in Athena, the location was GlueOutput folder.
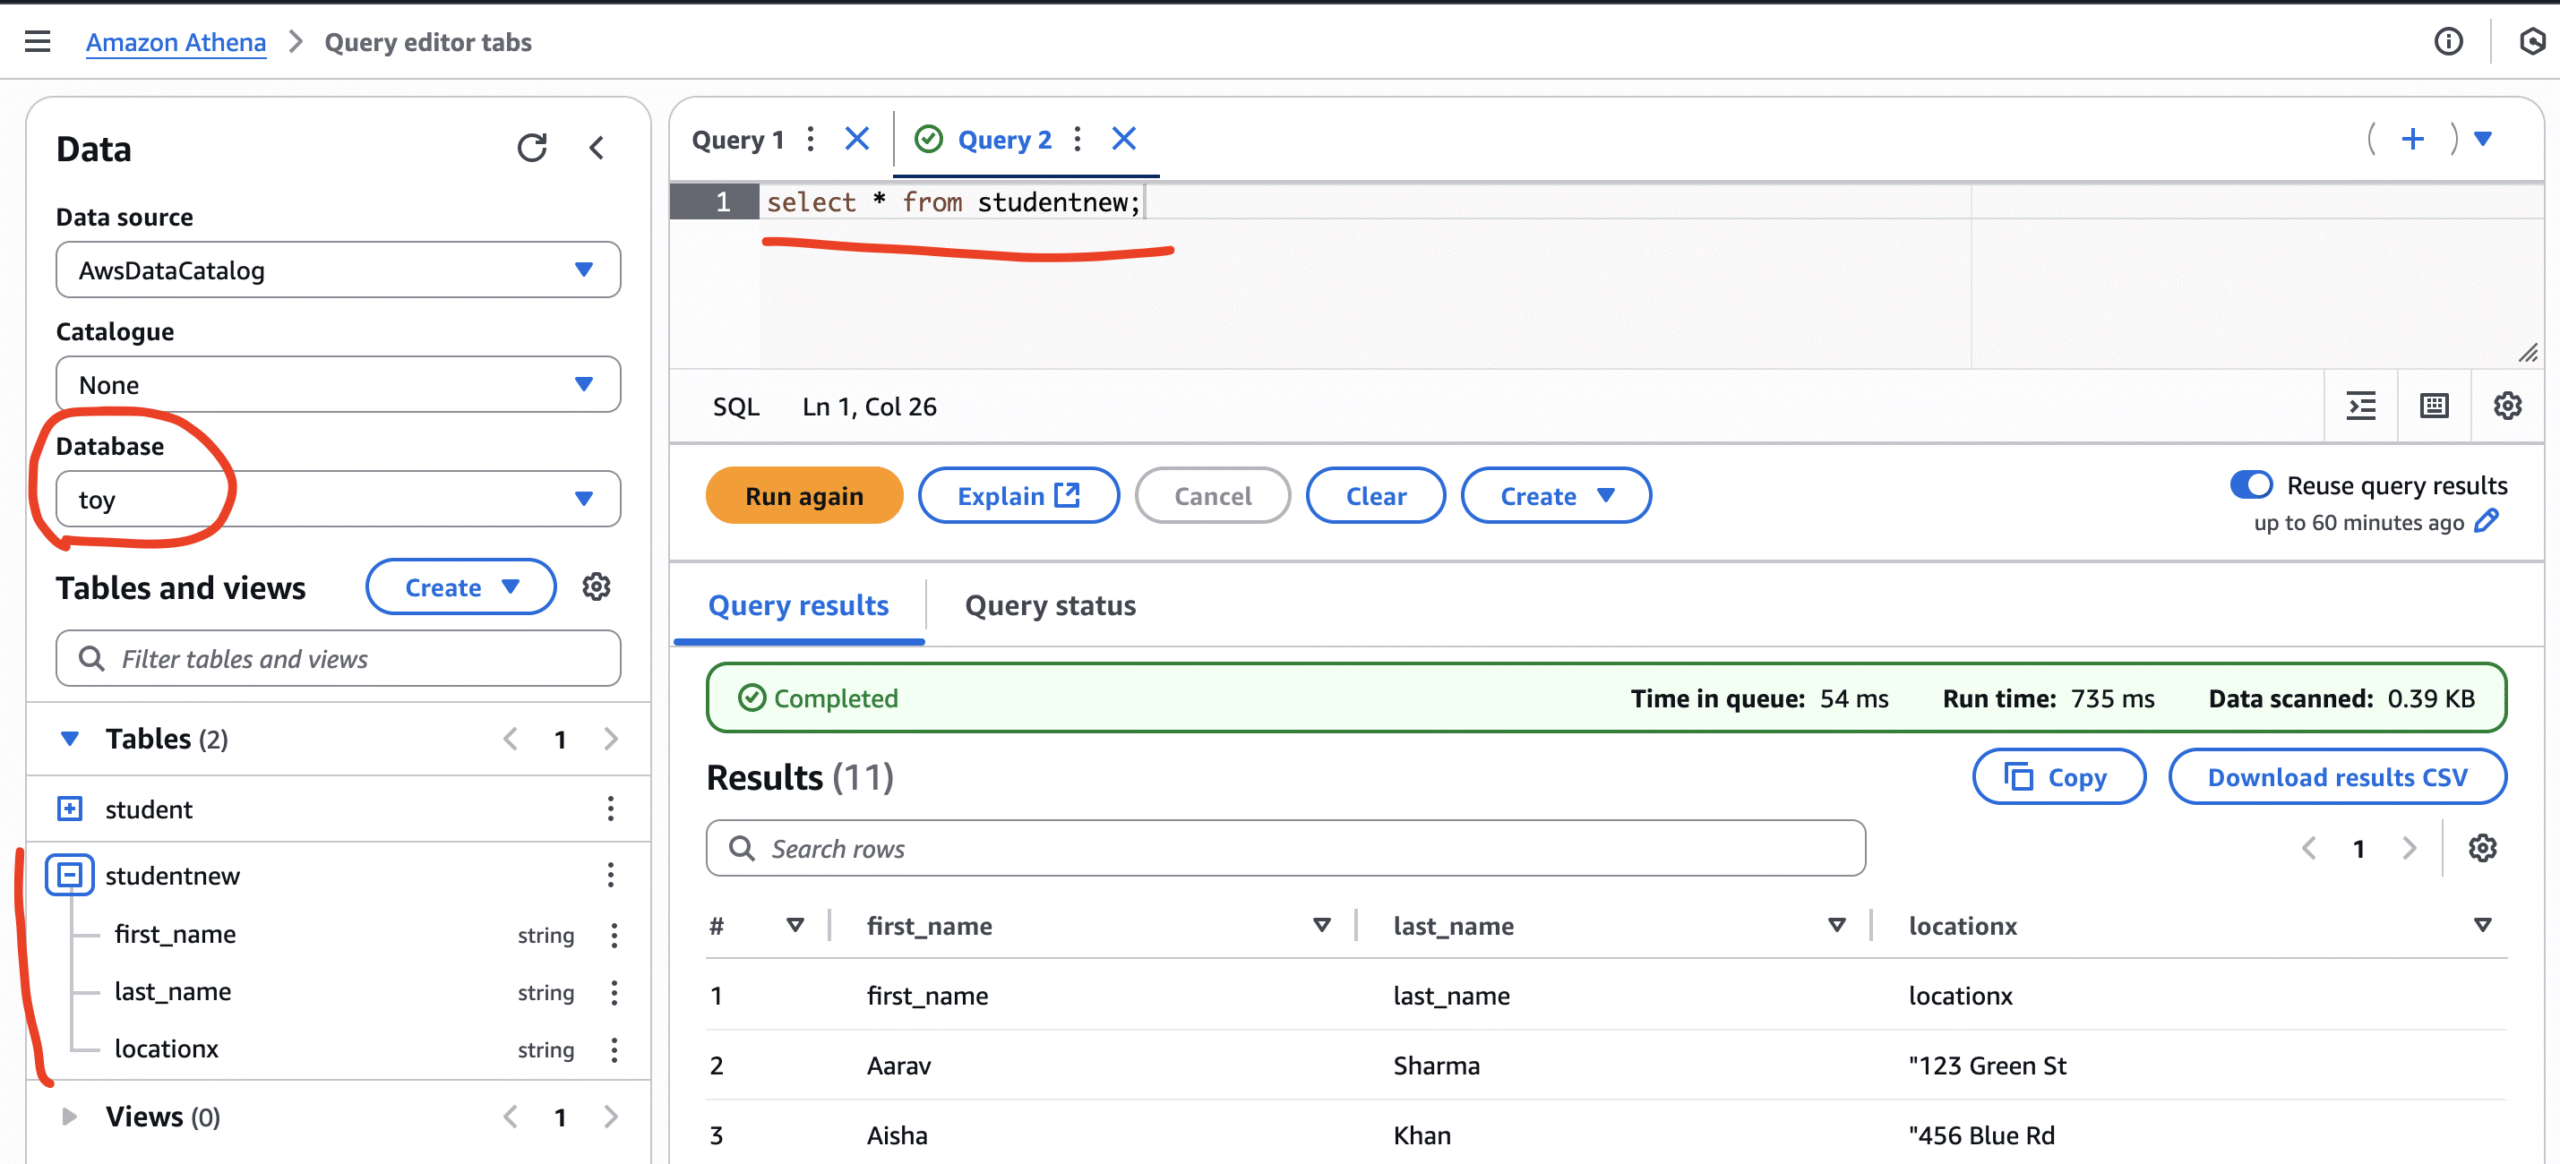
Step 9: This is the final step, where we varify the output data from Athena. Just open Athen and execute a query to retrieve data. The image below show the transformed data.
Conclusion Visual ETL job in AWS Glue:
In this blog we saw the process of creating Visual ETL job in AWS Glue. There multiple inbuilt tranformation functions, which we shall explore in our future blogs. In our next blog we shall explore the process of creating ETL job using pyspark programming.